Introduction to EGit
Last updated: February 13, 2024

Mocking is an essential part of unit testing, and the Mockito library makes it easy to write clean and intuitive unit tests for your Java code.
Get started with mocking and improve your application tests using our Mockito guide:
Handling concurrency in an application can be a tricky process with many potential pitfalls. A solid grasp of the fundamentals will go a long way to help minimize these issues.
Get started with understanding multi-threaded applications with our Java Concurrency guide:
Spring 5 added support for reactive programming with the Spring WebFlux module, which has been improved upon ever since. Get started with the Reactor project basics and reactive programming in Spring Boot:
Since its introduction in Java 8, the Stream API has become a staple of Java development. The basic operations like iterating, filtering, mapping sequences of elements are deceptively simple to use.
But these can also be overused and fall into some common pitfalls.
To get a better understanding on how Streams work and how to combine them with other language features, check out our guide to Java Streams:
Explore Spring Boot 3 and Spring 6 in-depth through building a full REST API with the framework:
Yes, Spring Security can be complex, from the more advanced functionality within the Core to the deep OAuth support in the framework.
I built the security material as two full courses - Core and OAuth, to get practical with these more complex scenarios. We explore when and how to use each feature and code through it on the backing project.
You can explore the course here:
Spring Data JPA is a great way to handle the complexity of JPA with the powerful simplicity of Spring Boot.
Get started with Spring Data JPA through the guided reference course:
Refactor Java code safely — and automatically — with OpenRewrite.
Refactoring big codebases by hand is slow, risky, and easy to put off. That’s where OpenRewrite comes in. The open-source framework for large-scale, automated code transformations helps teams modernize safely and consistently.
Each month, the creators and maintainers of OpenRewrite at Moderne run live, hands-on training sessions — one for newcomers and one for experienced users. You’ll see how recipes work, how to apply them across projects, and how to modernize code with confidence.
Join the next session, bring your questions, and learn how to automate the kind of work that usually eats your sprint time.
Distributed systems often come with complex challenges such as service-to-service communication, state management, asynchronous messaging, security, and more.
Dapr (Distributed Application Runtime) provides a set of APIs and building blocks to address these challenges, abstracting away infrastructure so we can focus on business logic.
In this tutorial, we'll focus on Dapr's pub/sub API for message brokering. Using its Spring Boot integration, we'll simplify the creation of a loosely coupled, portable, and easily testable pub/sub messaging system:
1. Overview
In this article, we’re going to explore EGit – an evolution of the JGit library for Eclipse.
2. EGit Setup
During the article, we’ll use the following tools:
- Eclipse Neon.3 version 4.6.3
- EGit plugin version 4.8
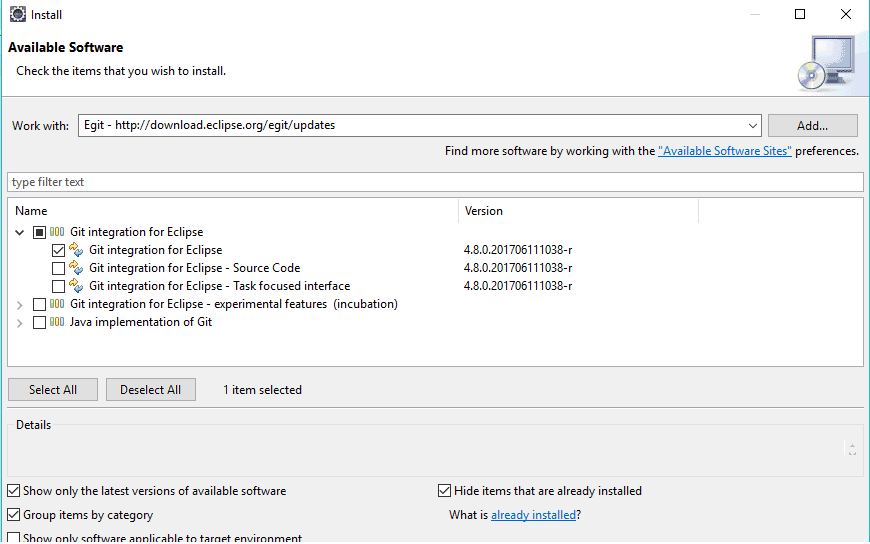
2.1. Installing EGit in Eclipse
Starting with Eclipse Juno, EGit is included with the Eclipse itself.
For older versions of Eclipse, we can install the plugin through Help -> Install New Software and providing the URL http://download.eclipse.org/egit/updates:
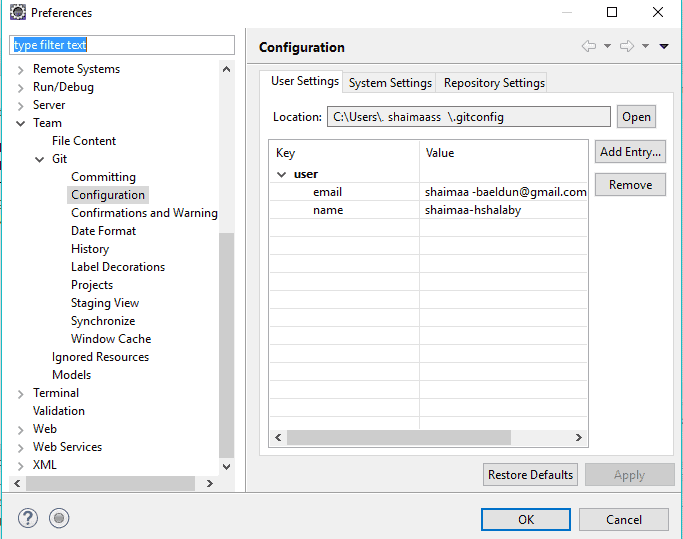
2.2. Identifying a Commiter
Git needs to keep track of the user behind a commit, therefore we should provide our identity when we make commits via EGit.
This is done through Preferences -> Team -> Git -> Configuration and clicking on Add Entry to include information for user.name and user.email:
3. Repositories
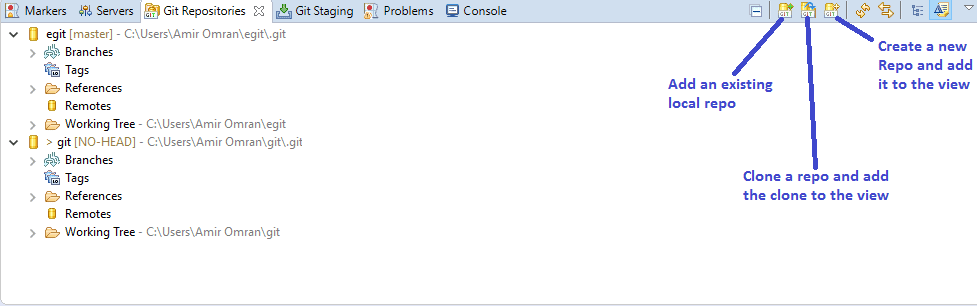
3.1. Repositories View
EGit comes with the Repositories view that allows us to:
- Browse our local repository
- Add and initialize local repositories
- Remove repositories
- Clone remote repositories
- Check out projects
- Manage branches
To open the Repositories view, click Window -> Show View -> Other -> Git -> Git Repositories:
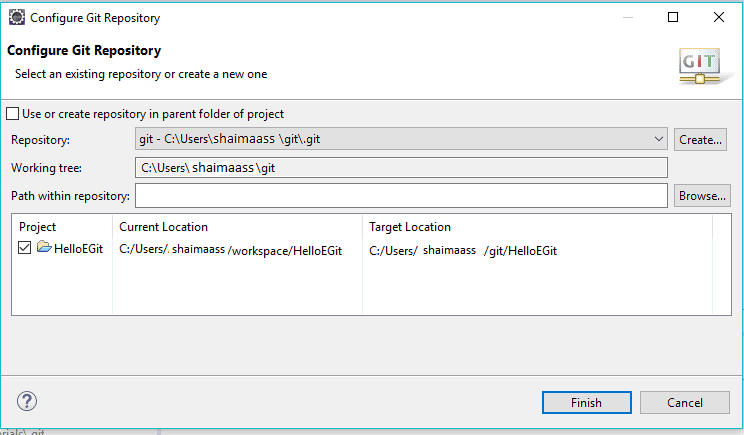
3.2. Creating a New Repository
We need to create a project and right-click on it to choose Team -> Share Project, and Create.
From here, we select the repository directory and click Finish:
3.3. Cloning a Repository
We can clone a repository from a remote git server to our local file system.
Let’s go to File -> Import… -> Git -> Projects from Git -> Next -> Clone URI -> Next, then the following window will be shown:
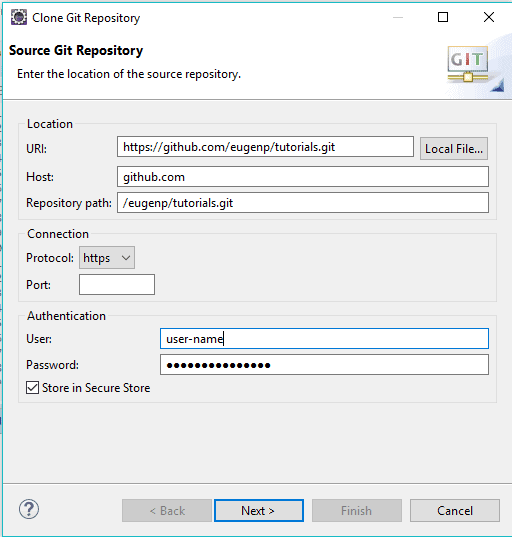
We can also open the same window from the Clone Remote Repository toolbar button in the Repositories view tab.
Git supports several protocols such as https, ssh, git, and etc. If we paste the remote repository’s URI, other entries will be filled automatically.
4. Branches
There are two types of branches we’ll deal with:
- Local branch
- Remote tracking branch
4.1. Creating Local Branch
We can create a new local branch by clicking Team -> Repository -> Switch to -> New Branch:
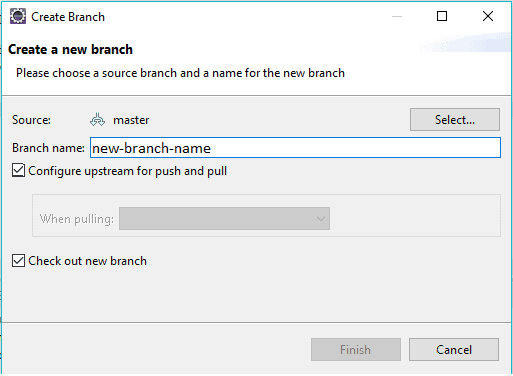
We can choose the remote tracking branch from which to base our local branch. Adding upstream configuration to our new local branches will simplify synchronizing the local changes with the remote ones.
It’s recommended to check the option in the dialog Configure upstream for push and pull.
Another method to open the new branch dialog by right-clicking on branches in the Repositories view -> Switch To -> New Branch
4.2. Checking out the Branch
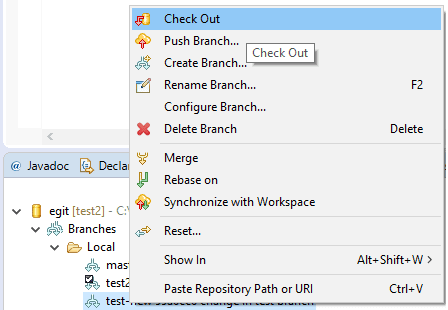
From the Repositories view, right click on the branch name and click Check Out:
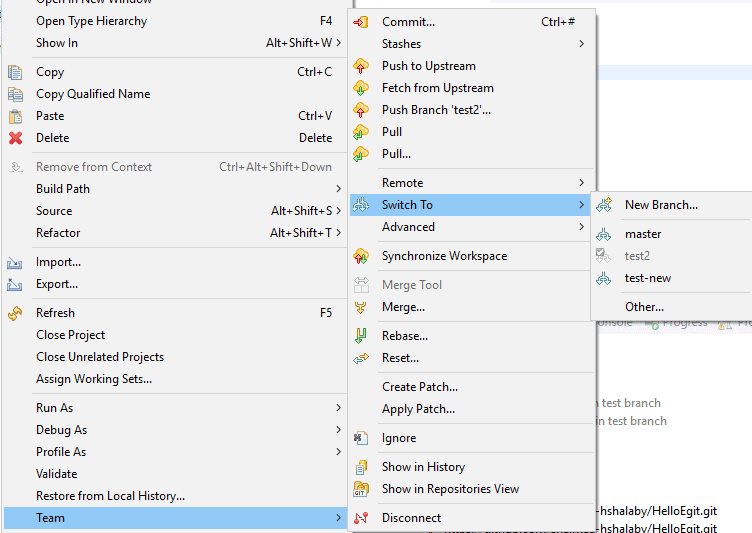
Or right-click on the project and select Team -> Switch To -> select the branch name:
5. Tracking Files With Git
5.1. Tracking Changes
Question mark signs appear on files which are not yet under Git’s control. We can track these new files by right-clicking on them and selecting Team -> Add to Index.
From here the decorator should change to (+) sign.
5.2. Committing Changes
We want to commit changes to a tracked files. This is done by right-clicking on these files and choosing Team -> Commit:
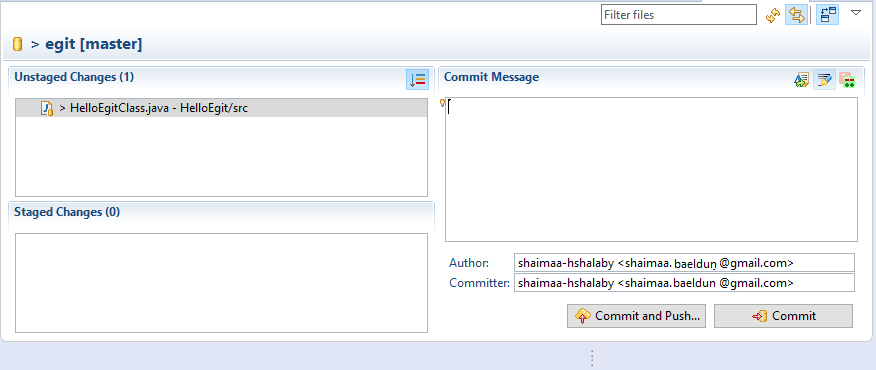
By default, the author and committer are taken from the .gitconfig file in our home directory.
We can enter a commit message to explain the changes. In addition, by clicking on Add Signed-off-by icon in the top right corner, we can add a Signed-off-by tag.
5.3. Inspecting History
We can check the history of a file by right-clicking on it and choosing Team -> Show in History.
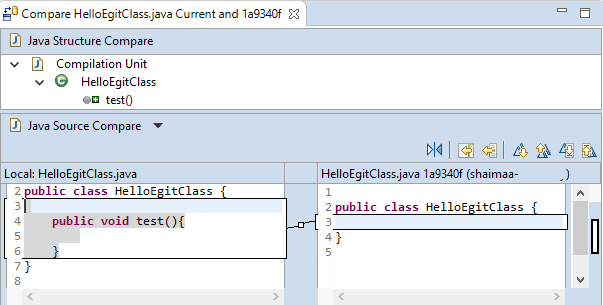
A history dialog will show all the committed changes of the inspected file:

We can open the last committed changes in the compare view by clicking on the compare mode icon in the top right corner in the history tab and then double-clicking on the file name (here’s an example: HelloEgit/src/HelloEgitClass.java) in file list:
5.4. Pushing Changes to the Remote Repository
To push our changes we need to have a remote Git repository.
From Team -> Remote -> Push we can enter the https URL of the new Git remote repository in a wizard:
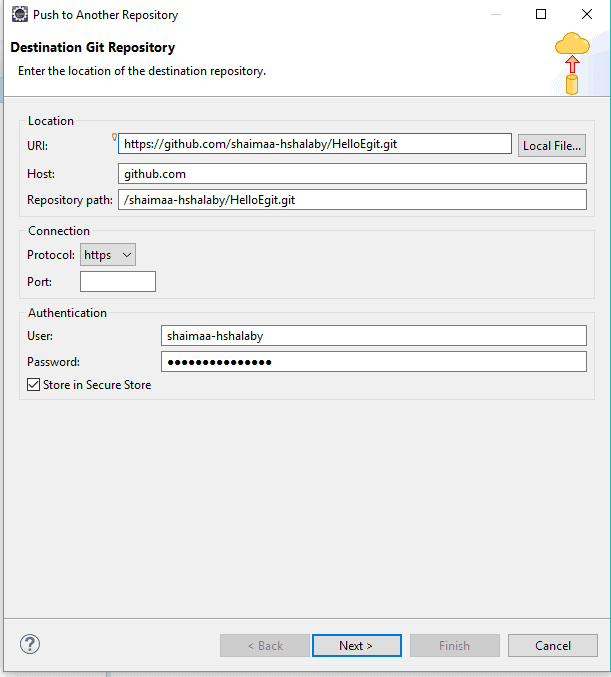
Next steps are to:
- Choose the Add All Branches Spec to map local branch names to the same branch names in the destination repository
- Push the confirmation button – the wizard will show a preview of changed files
- Finally, we click Finish to push our repository to the remote location.
If we have set up the Upstream Configuration from section 4.1, this configuration dialog will not be shown and the push will be much easier.
5.5. Fetching from Upstream
If we are working with a local branch that is based on a remote tracking branch, we can now fetch changes from the upstream.
In order to fetch from the upstream, we right click on the project and select Team -> Fetch from Upstream (or by right-clicking on the repository on the Repositories View and selecting Fetch from Upstream).
This fetch can be configured by right-clicking on the project and selecting Team -> Remote -> Configure Fetch from Upstream:

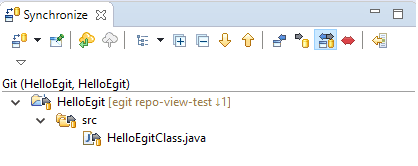
5.6. Comparing & Synchronizing
If we want to see the changes between the local working directory and a committed change, we can right click on the resource and choose Compare With. This opens the Synchronize View to allow us to browse the changes:
By double-clicking on the changed file, the compare editor will be opened, allowing us to compare the changes.
If we want to compare two commits, we need to select Team -> Show in History.
From the history view, we’ll highlight the two commits that we want to compare and select the Compare with Each Other option:

If we want to compare between the working directory and a branch, we can use Team -> Synchronize
5.7. Merging
Merging incorporates changes from one branch or tag into the currently checked out branch.
We can merge by clicking Team -> Merge or by right-clicking on the repository name in the repositories view and select Merge:

Now we can select the branch or tag that we want to merge with the currently checked out branch.
6. Conclusion
In this tutorial, we introduced the EGit plugin for eclipse, how to install and configure it and how to use in our daily development.
For more details on EGit, check out its official documentation here.