Mocking is an essential part of unit testing, and the Mockito library makes it easy to write clean and intuitive unit tests for your Java code.
Get started with mocking and improve your application tests using our Mockito guide:
Handling concurrency in an application can be a tricky process with many potential pitfalls. A solid grasp of the fundamentals will go a long way to help minimize these issues.
Get started with understanding multi-threaded applications with our Java Concurrency guide:
Spring 5 added support for reactive programming with the Spring WebFlux module, which has been improved upon ever since. Get started with the Reactor project basics and reactive programming in Spring Boot:
Since its introduction in Java 8, the Stream API has become a staple of Java development. The basic operations like iterating, filtering, mapping sequences of elements are deceptively simple to use.
But these can also be overused and fall into some common pitfalls.
To get a better understanding on how Streams work and how to combine them with other language features, check out our guide to Java Streams:
Explore Spring Boot 3 and Spring 6 in-depth through building a full REST API with the framework:
Yes, Spring Security can be complex, from the more advanced functionality within the Core to the deep OAuth support in the framework.
I built the security material as two full courses - Core and OAuth, to get practical with these more complex scenarios. We explore when and how to use each feature and code through it on the backing project.
You can explore the course here:
Spring Data JPA is a great way to handle the complexity of JPA with the powerful simplicity of Spring Boot.
Get started with Spring Data JPA through the guided reference course:
Refactor Java code safely — and automatically — with OpenRewrite.
Refactoring big codebases by hand is slow, risky, and easy to put off. That’s where OpenRewrite comes in. The open-source framework for large-scale, automated code transformations helps teams modernize safely and consistently.
Each month, the creators and maintainers of OpenRewrite at Moderne run live, hands-on training sessions — one for newcomers and one for experienced users. You’ll see how recipes work, how to apply them across projects, and how to modernize code with confidence.
Join the next session, bring your questions, and learn how to automate the kind of work that usually eats your sprint time.
Distributed systems often come with complex challenges such as service-to-service communication, state management, asynchronous messaging, security, and more.
Dapr (Distributed Application Runtime) provides a set of APIs and building blocks to address these challenges, abstracting away infrastructure so we can focus on business logic.
In this tutorial, we'll focus on Dapr's pub/sub API for message brokering. Using its Spring Boot integration, we'll simplify the creation of a loosely coupled, portable, and easily testable pub/sub messaging system:
If you're working on a Spring Security (and especially an OAuth) implementation, definitely have a look at the Learn Spring Security course:
>> LEARN SPRING SECURITY1. Overview
In this tutorial, we’ll be setting up SAML2 with Spring Boot. SAML is a long-trusted technology for implementing secure applications. Setting up SAML requires configurations of multiple parties, hence making the process somewhat complex. We have to move back and forth a few times between our Service Provider and Identity Provider, so it requires patience as we follow a step-by-step guide. Let’s dive into each of the steps to create our working app.
2. Setting Up the Service Provider (Sp)
In our case, the Spring Boot application is our Service Provider. Let’s set up a Spring Boot app with Spring Security, Spring MVC, and OpenSAML dependencies. A key dependency is Spring Security SAML2. The new SAML2 support in the Spring Security framework is provided via a single dependency:
<dependency>
    <groupId>org.springframework.security</groupId>
    <artifactId>spring-security-saml2-service-provider</artifactId>
</dependency>
2.1. SAML Configurations
Let’s now add the necessary configurations for SAML2 in our application.yml. The most important configuration is the metadata from the Identity Provider. Although we’ve added the metadata-uri to our configurations for completion, at this moment, it isn’t available yet:
spring:
  security:
    saml2:
      relyingparty:
        registration:
          okta:
            signing:
              credentials:
                - private-key-location: classpath:local.key
                  certificate-location: classpath:local.crt
            singlelogout:
              binding: POST
              response-url: "{baseUrl}/logout/saml2/slo"
            assertingparty:
              metadata-uri: "classpath:metadata/metadata-idp.xml"
The singlelogout configuration defines the endpoint where our Identity Provider will redirect after successful logout. Furthermore, the signing credentials configuration adds the key and the certificate that our app will use to sign the logout request to the Identity Provider. We use the OpenSSL tool to generate the local.key and local.crt files:
openssl req -newkey rsa:2048 -nodes -keyout local.key -x509 -days 365 -out local.crt2.2. Security Configurations in the Code
In this step, let’s add a security filter to our filter chain. This filter adds the Identity Provider metadata to our security context. In addition to this, let’s also add saml2Login() and saml2Logout() method calls on our http object to enable login and logout, respectively:
Saml2MetadataFilter filter = new Saml2MetadataFilter(relyingPartyRegistrationResolver, new OpenSamlMetadataResolver());

http.csrf(AbstractHttpConfigurer::disable).authorizeHttpRequests(authorize -> authorize.anyRequest()
  .authenticated())
  .saml2Login(withDefaults())
  .saml2Logout(withDefaults())
  .addFilterBefore(filter, Saml2WebSsoAuthenticationFilter.class);

return http.build();
We’re using the withDefaults() method to configure the default behaviors for saml2Login and saml2Logout. This is the real power of using the Spring Boot platform. Only a few lines of code complete all our SAML2 application setup. Next, we’re going to set up our Identity Provider in Okta.
3. Setting Up the Identity Provider (IdP)
In this step, let’s set up Okta as our Identity Provider. The Identity Provider is the party that authenticates our users and generates a SAML assertion as a result. Then, this SAML assertion is communicated back to our User Agents. The User Agents present this SAML assertion to the Service Provider for authentication. The Service Provider verifies it from the Identity Provider and allows the users to access its resources.
On the Okta developer account after signup and login, we get a screen with a left sidebar. In this sidebar, let’s navigate to the Applications page and start our SAML application integration process:
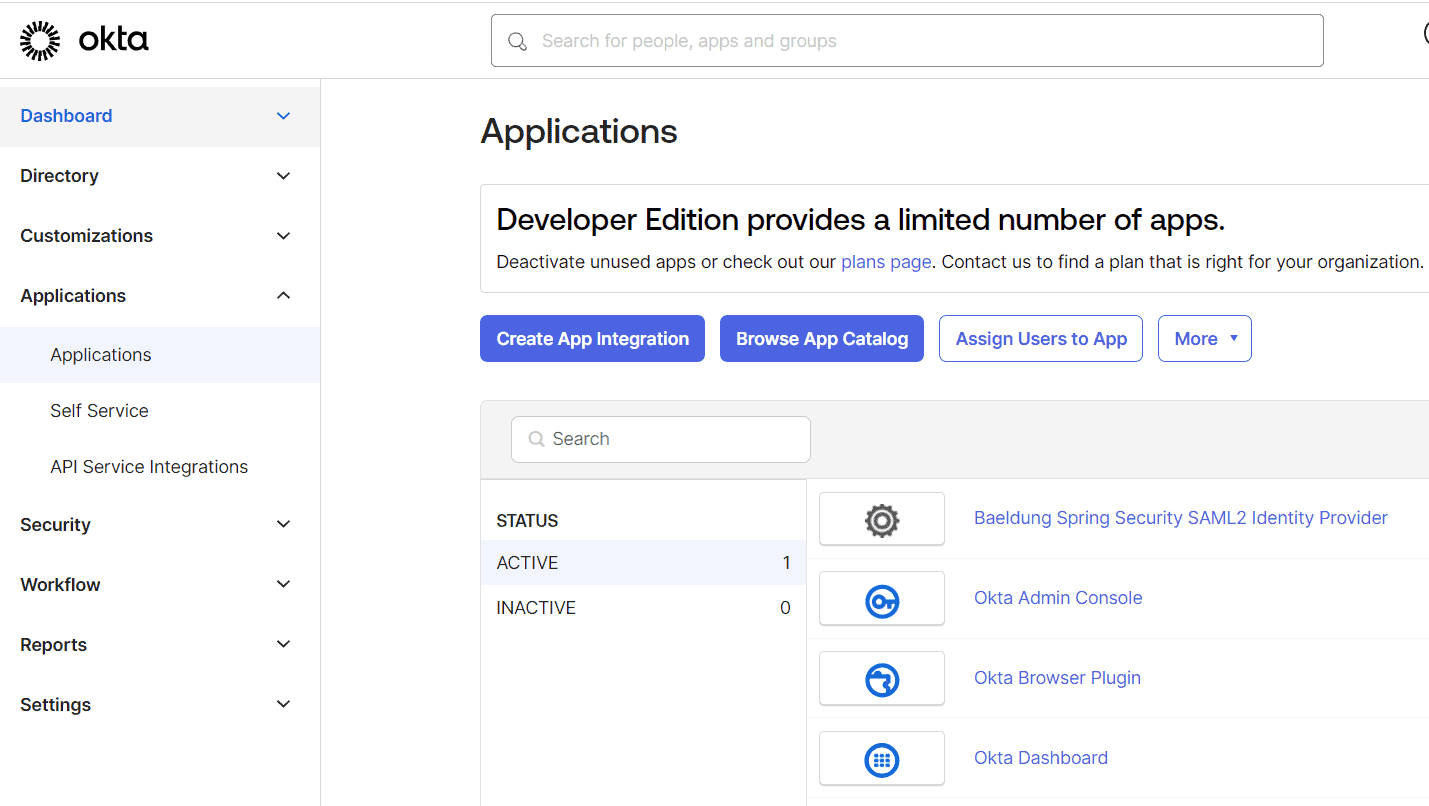
3.1. Create App Integration
Next, let’s click ‘Create App Integration’ to open the ‘Create a new app integration’ dialog and choose SAML 2.0:
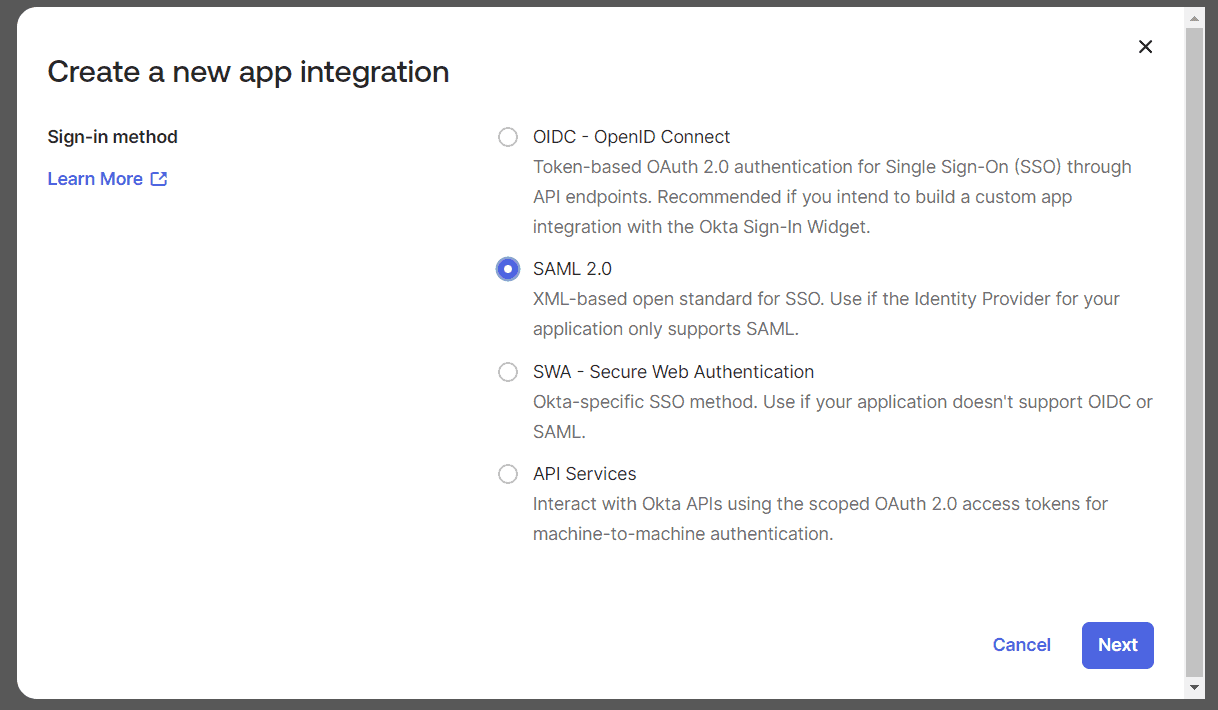
We’ll click on ‘Next’ to start the ‘Create SAML Integration’ wizard. This is a three-step wizard. Let’s complete each step to finish our setup.
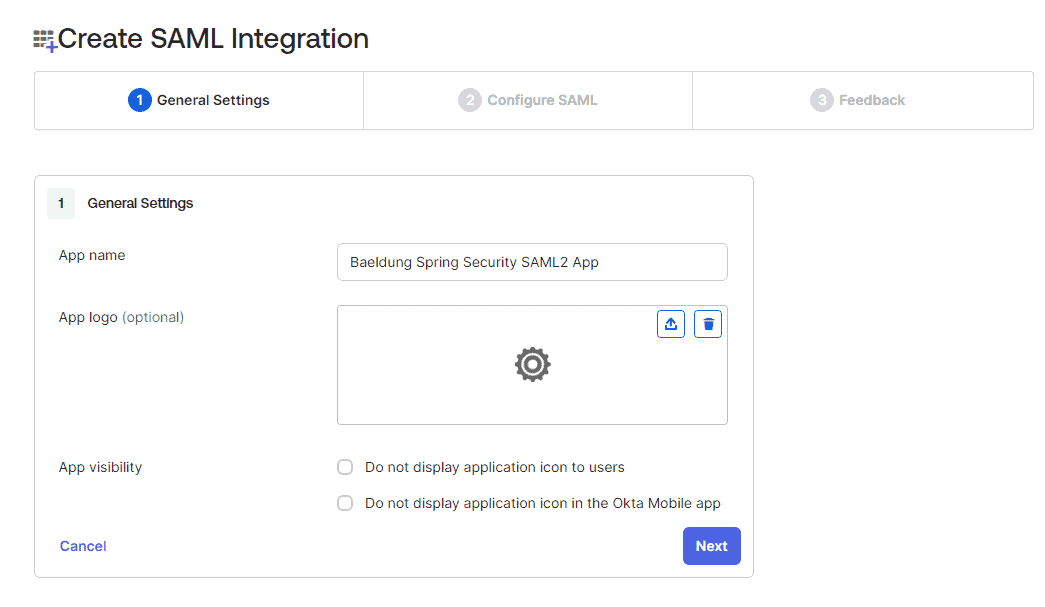
3.2. General Settings
We enter our app name in this step as ‘Baeldung Spring Security SAML2 App‘:
3.3. Configure SAML
Let’s now configure the most important details for our SAML app. Here, we’ll register the Single Sign-on URL in the Identity Provider. As a result, the Identity Provider accepts the SSO request coming from this URL. The Audience URI is the identifier for the SAML assertion recipient. This is added to the SAML assertion that is generated and sent back to the user agent:

The Audience URI in our example is http://localhost:8080/saml2/service-provider-metadata/okta while the single sign-on URL is http://localhost:8080/login/saml2/sso/okta
3.4. Advanced Settings and User Attributes
Let’s now expand the ‘Show Advanced Settings’ section. In order to enable the singlelogout feature, we’ll need to upload the local.crt certificate here. This is the same certificate we have configured in our Service Provider application.yml. The Service Provider app signs any logout request using this certificate.
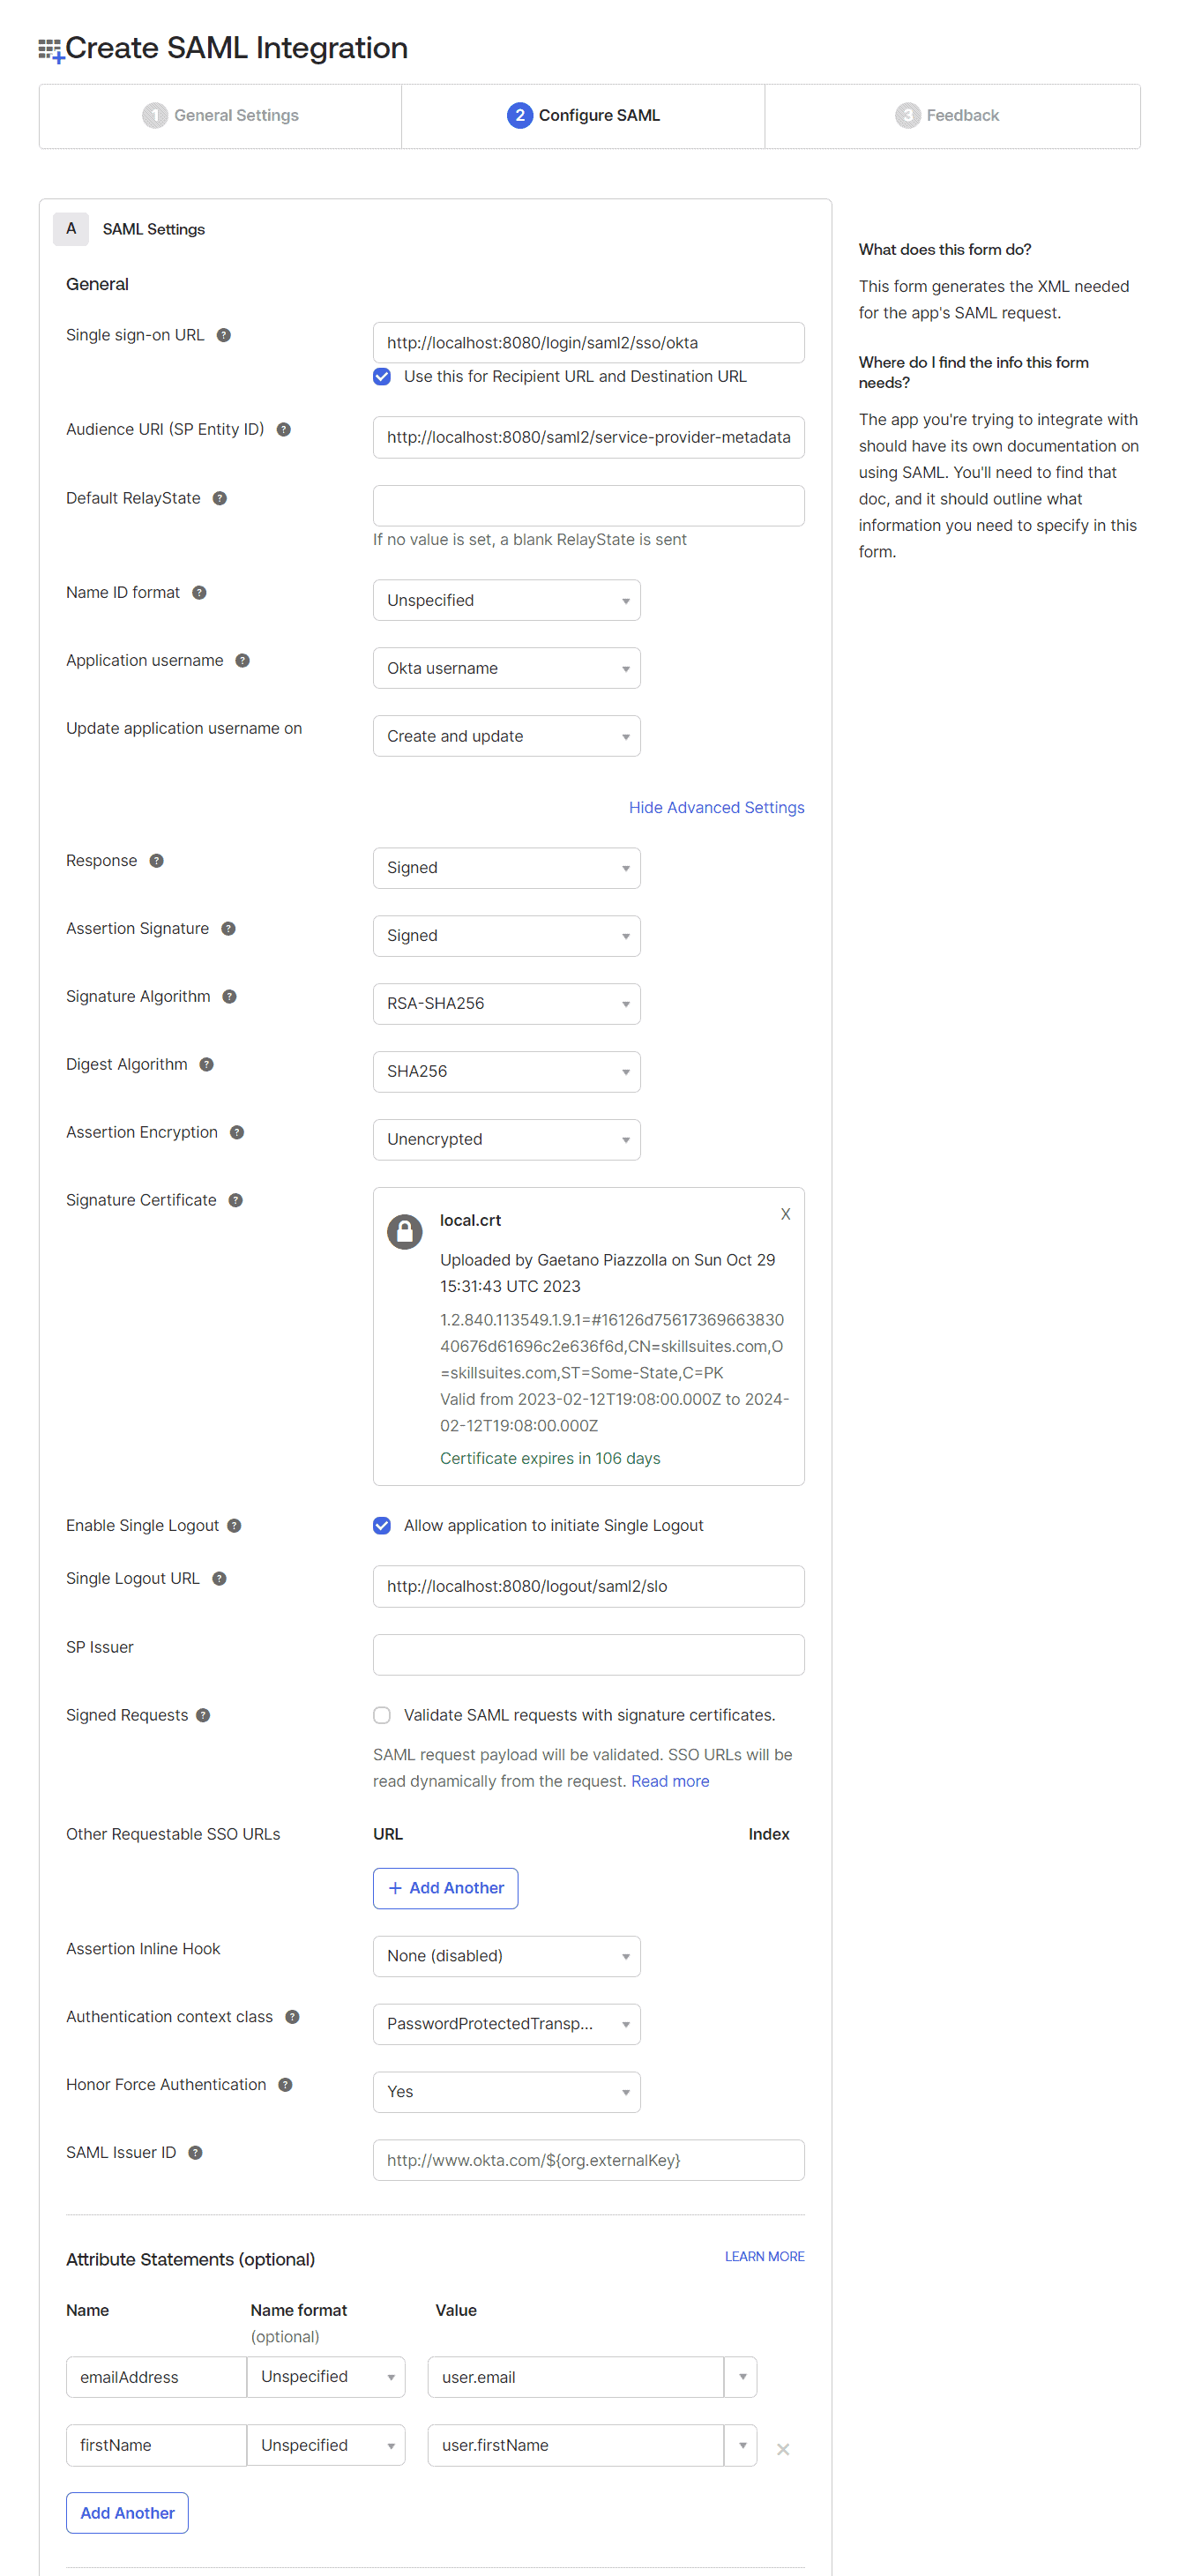
Additionally, let’s configure the ‘Single Logout URL’ as http://localhost:8080/logout/saml2/slo.
In the end, we also configure the Attribute Statements for emailAddress and firstName:
emailAddress -> Unspecified -> user.email
firstName -> Unspecified -> user.firstName
Let’s preview the SAML assertion using the ‘Preview the SAML Assertion’ link at the bottom of this step before moving to the ‘Next’ step.

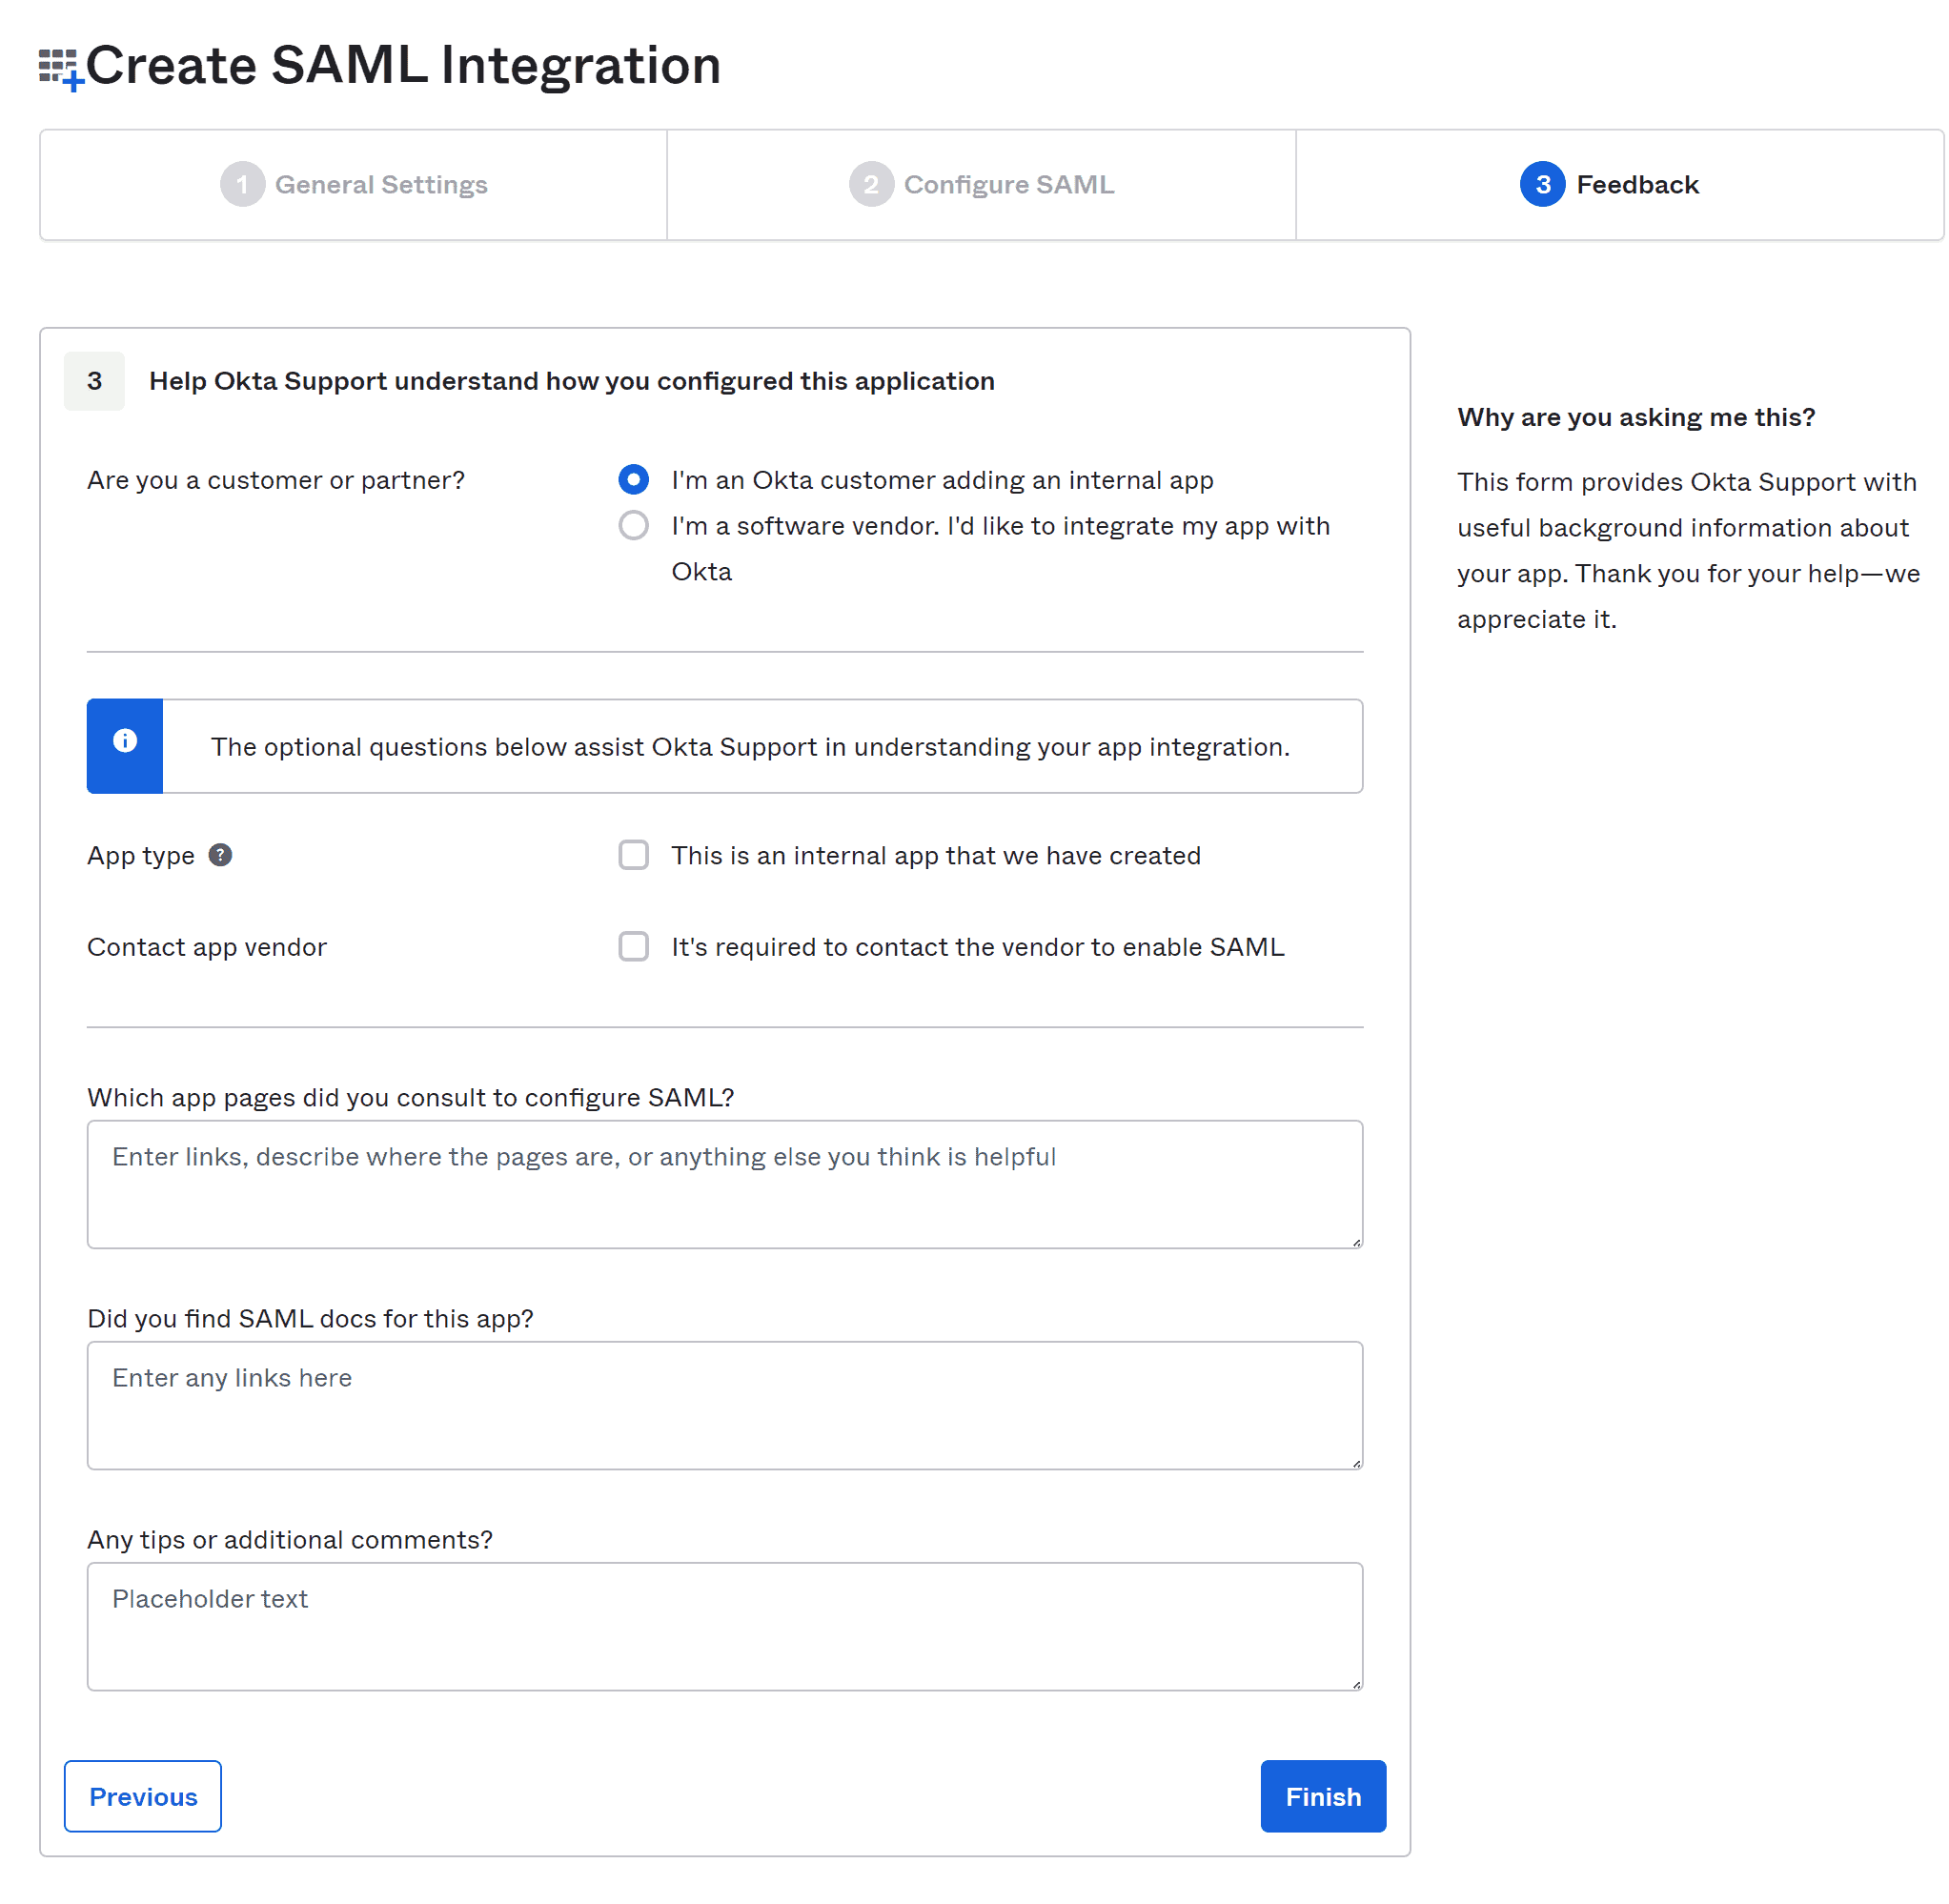
3.5. Final Feedback
On the feedback step, let’s choose the option, “I’m an Okta customer adding an internal app”.
3.6. SAML Setup Instructions
After completing the feedback step, we’ll end up on the ‘Sign On’ tab for our application. On this screen let’s follow the link “View SAML setup instructions” at the bottom of the right sidebar:
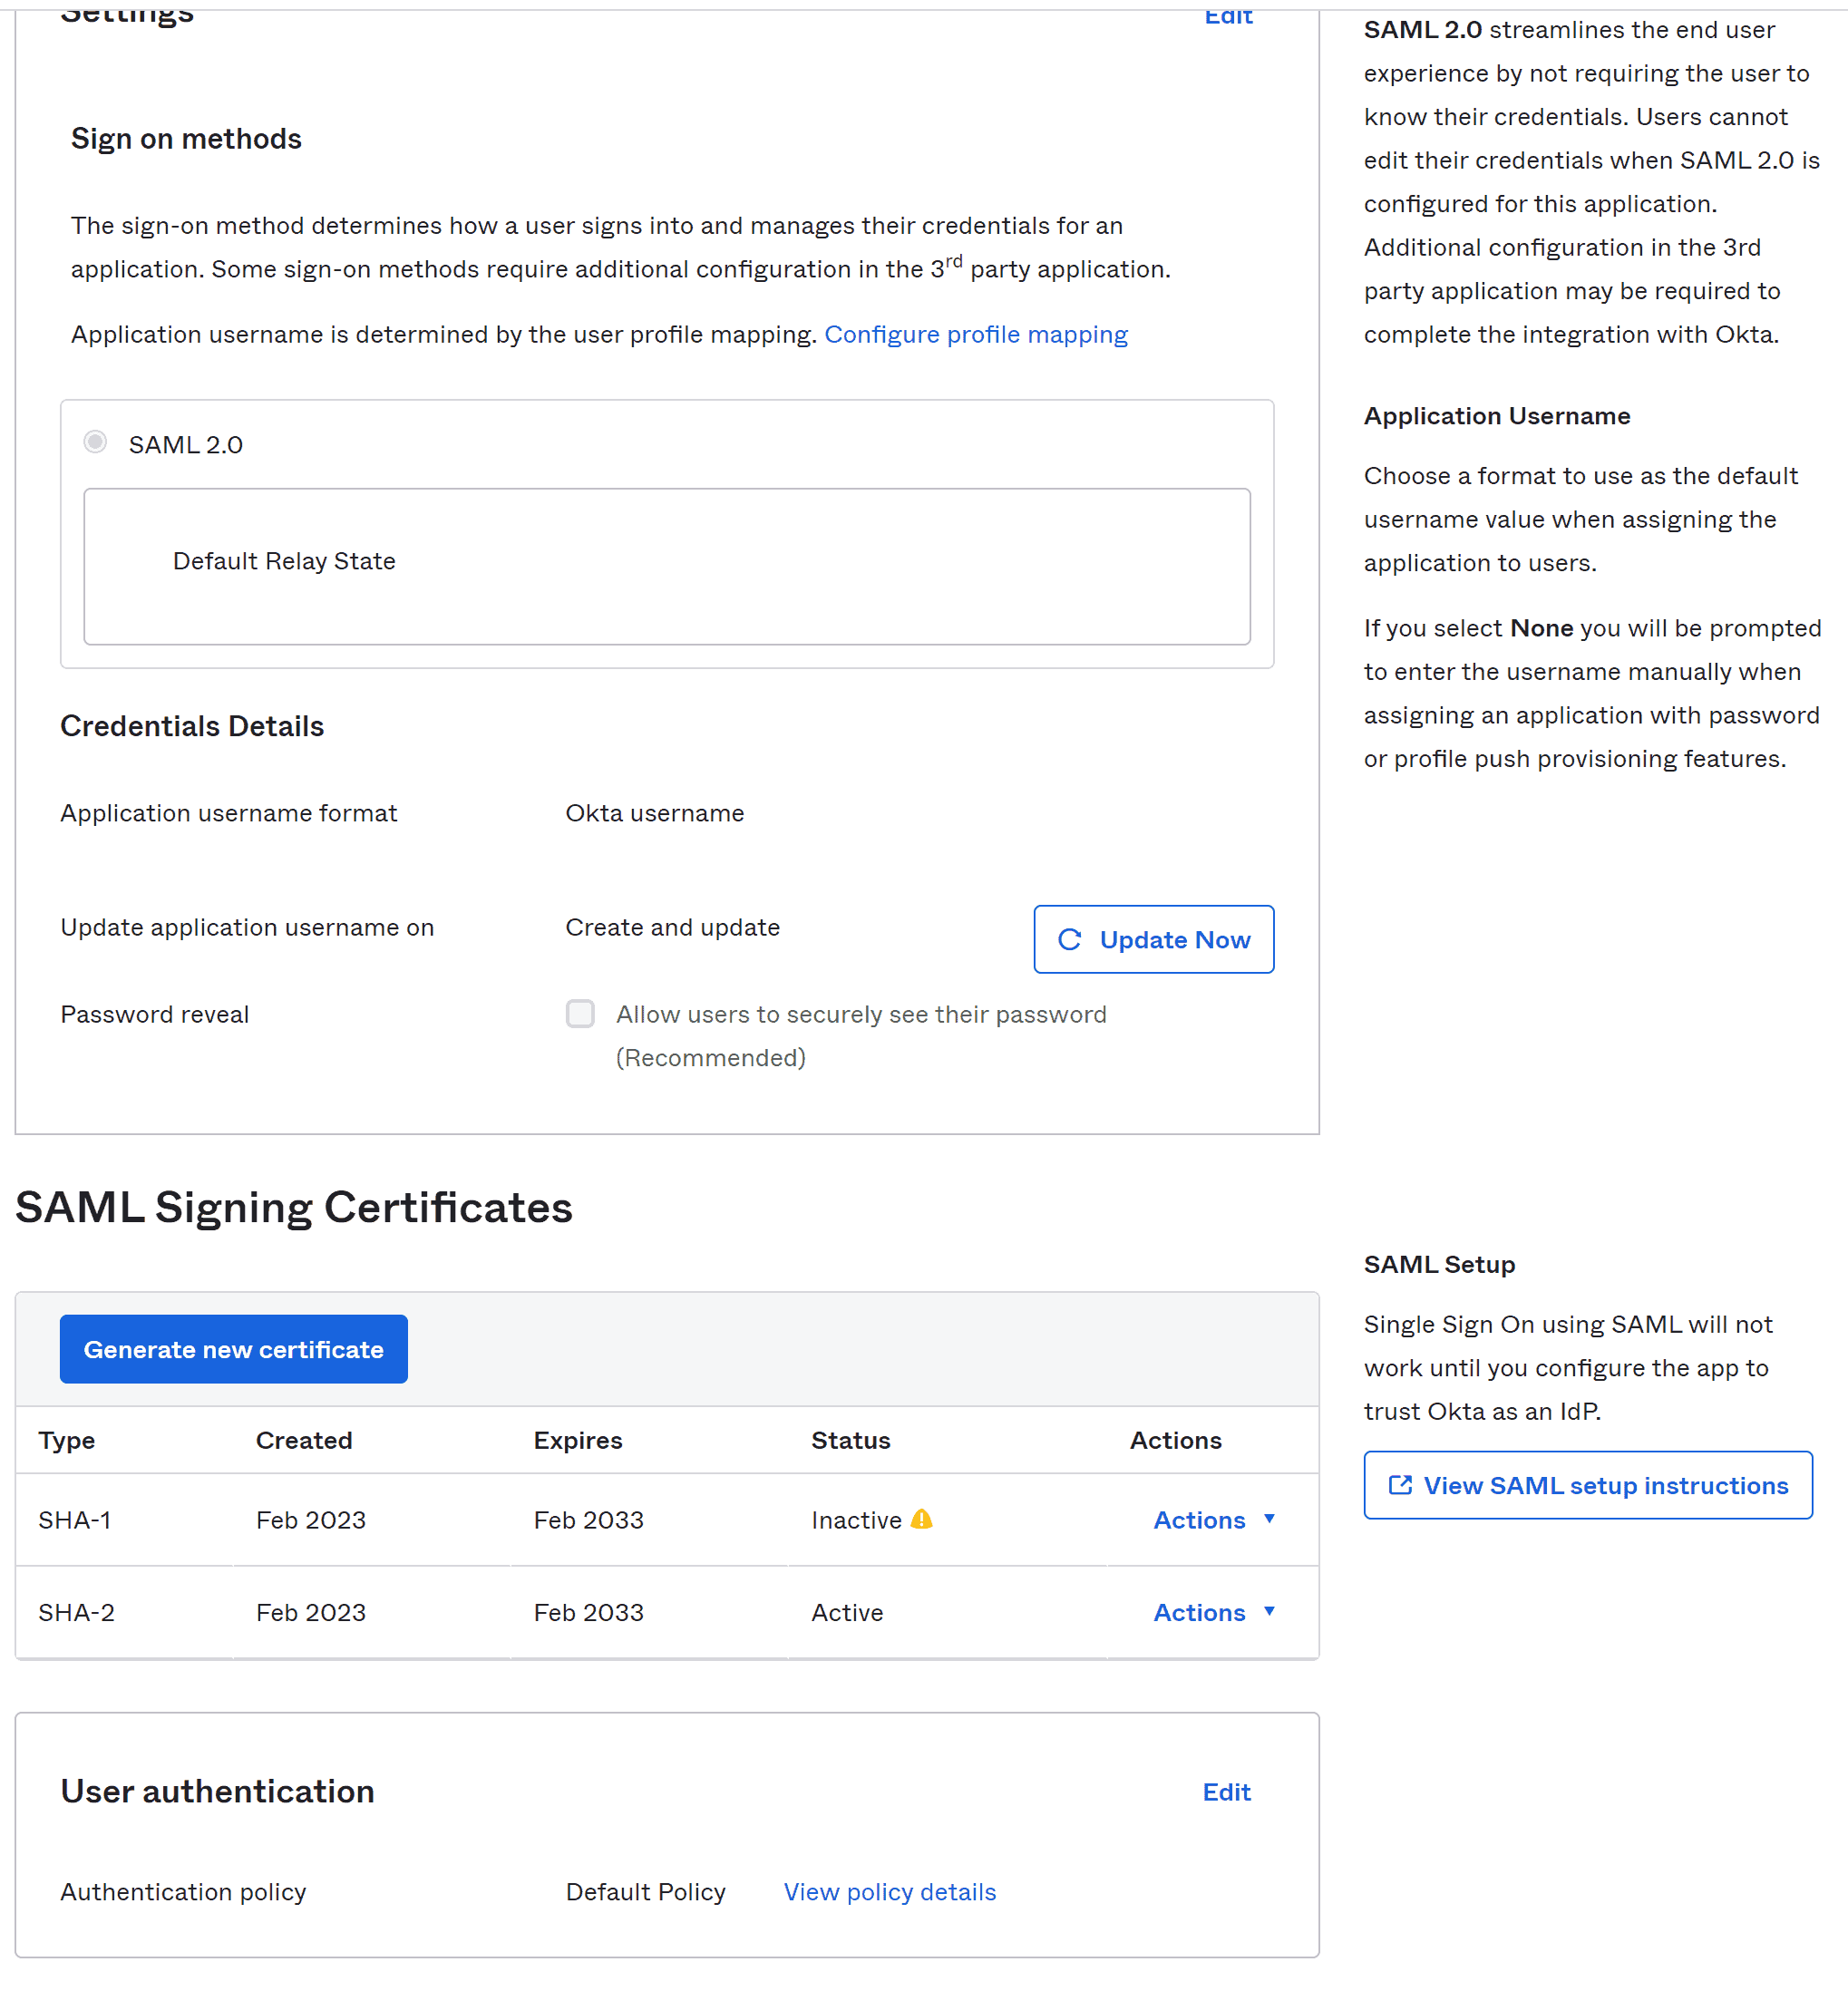
This takes us to a page with the necessary information about our Identity Provider. Let’s move to the last field that has IdP metadata present in it:
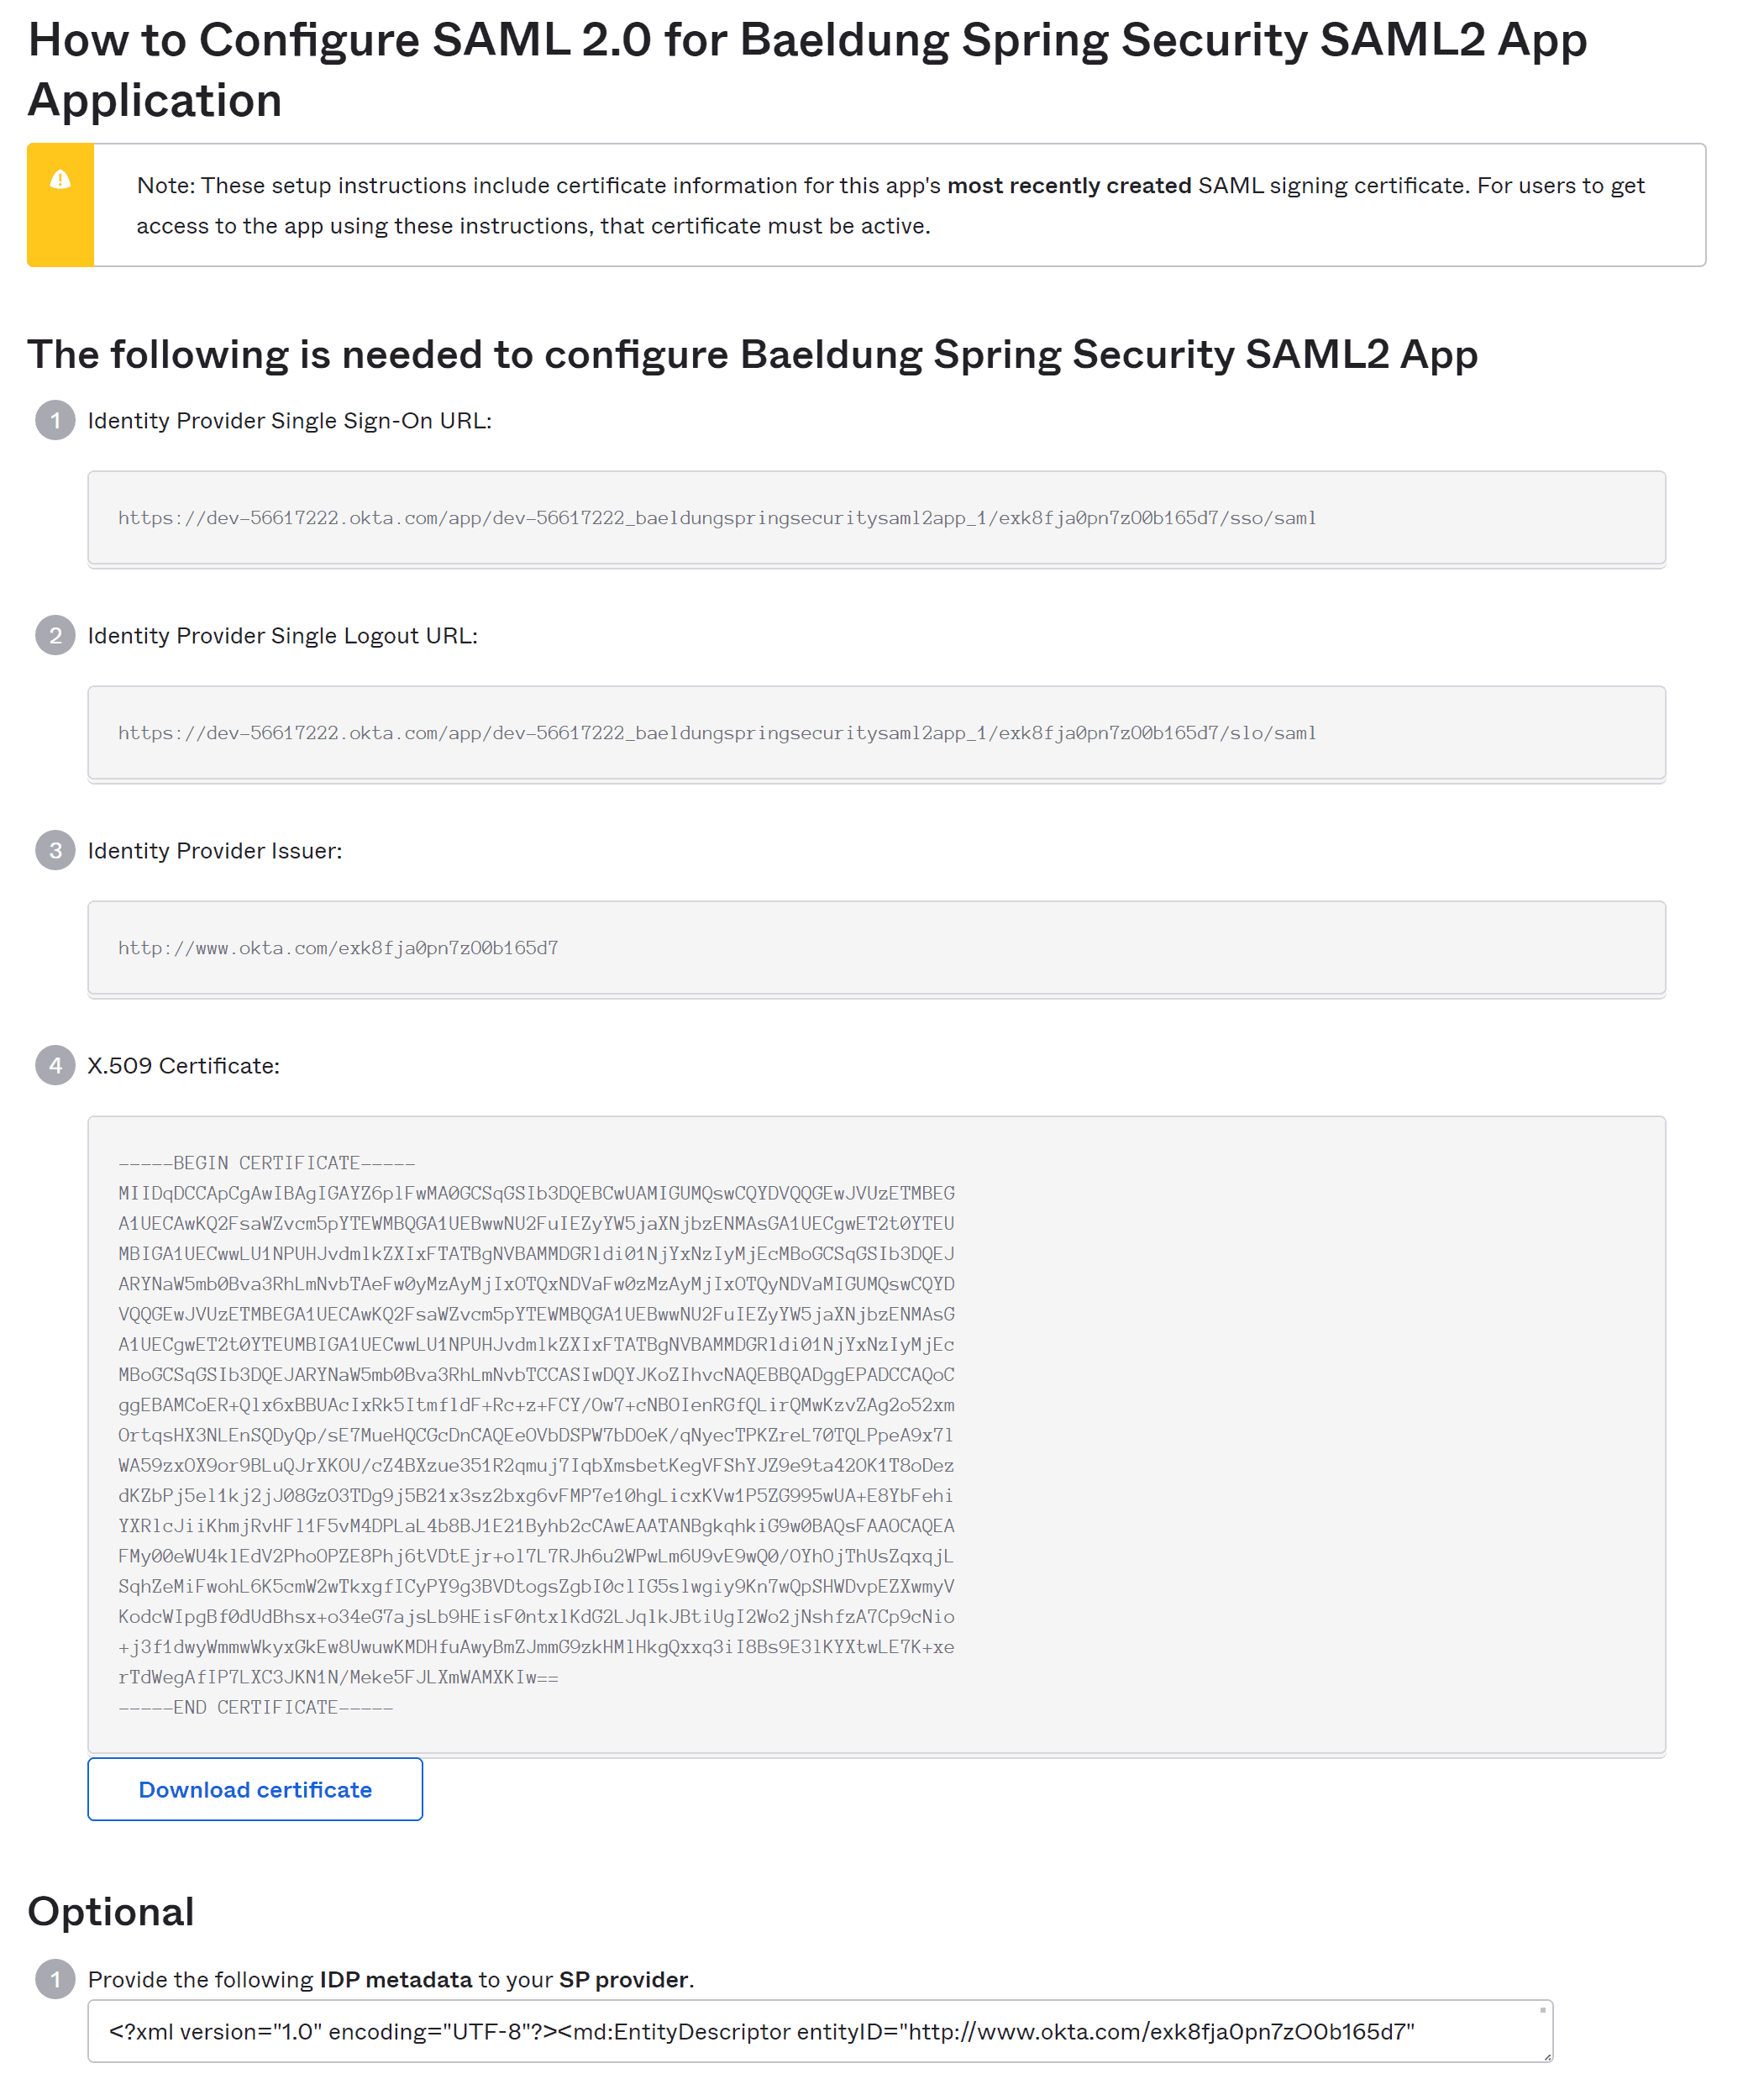
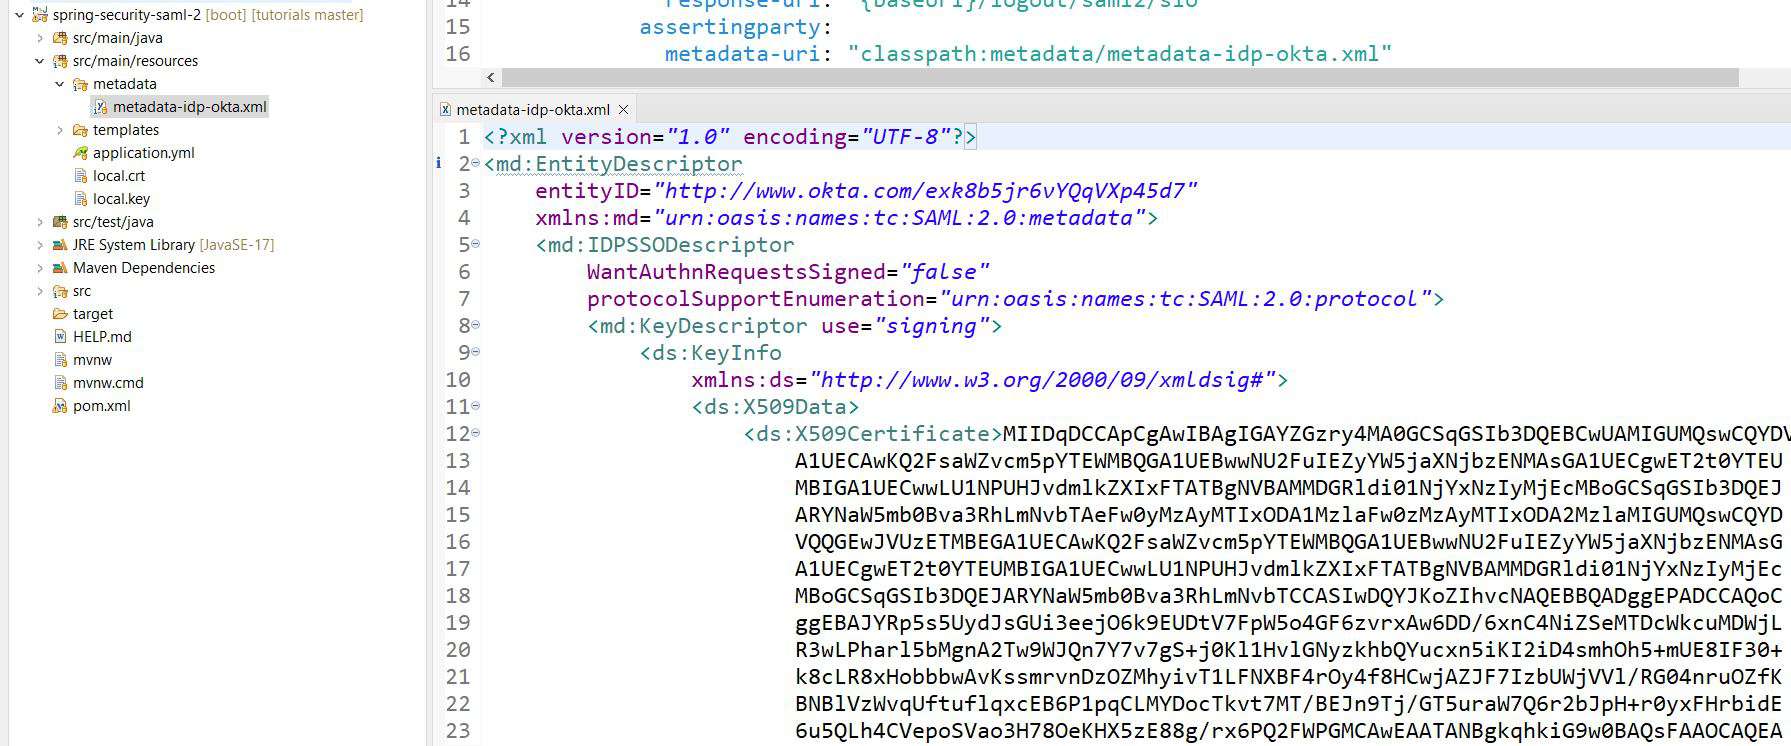
We copy this metadata and save it as metadata-idp-okta.xml in our Service Provider app resources/metadata folder, hence fulfilling the requirement of metadata_uri in our application.yml:
This completes our setup for both the ‘Service Provider’ and the ‘Identity Provider’. Next, we’re going to create a user and assign it to our application in our Okta developer account.
4. Creating the User Principal
Let’s sign in to the Okta developer account and navigate to the ‘People’ page under the ‘Directory’ section in the left sidebar. Here, we’ll fill out the ‘Add Person’ form to create a user. Sometimes, it might need a refresh of the ‘People’ page to see the new user in the list:
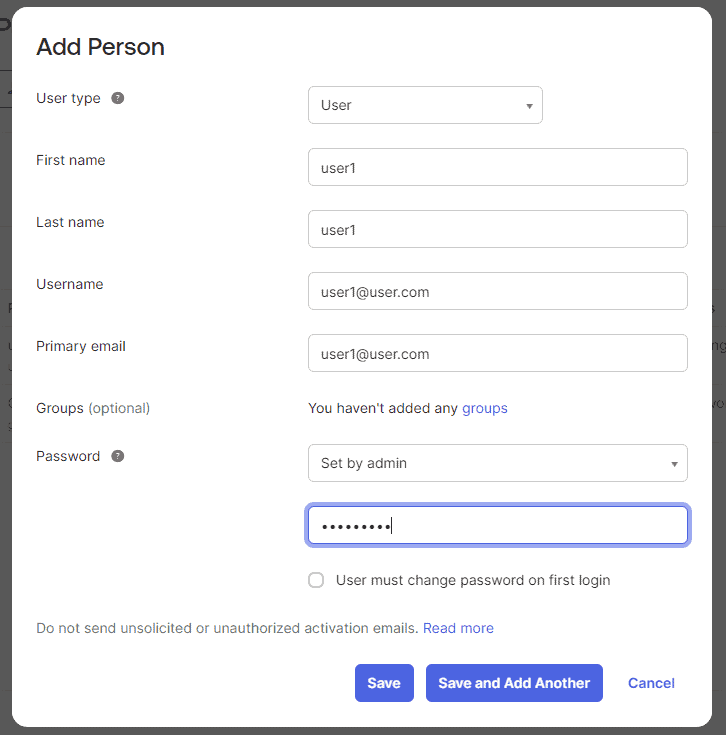
In this case, we are activating the user automatically. Usually, you might want to send an activation email or switch the toggle to make the user change the assigned password on the first attempt.
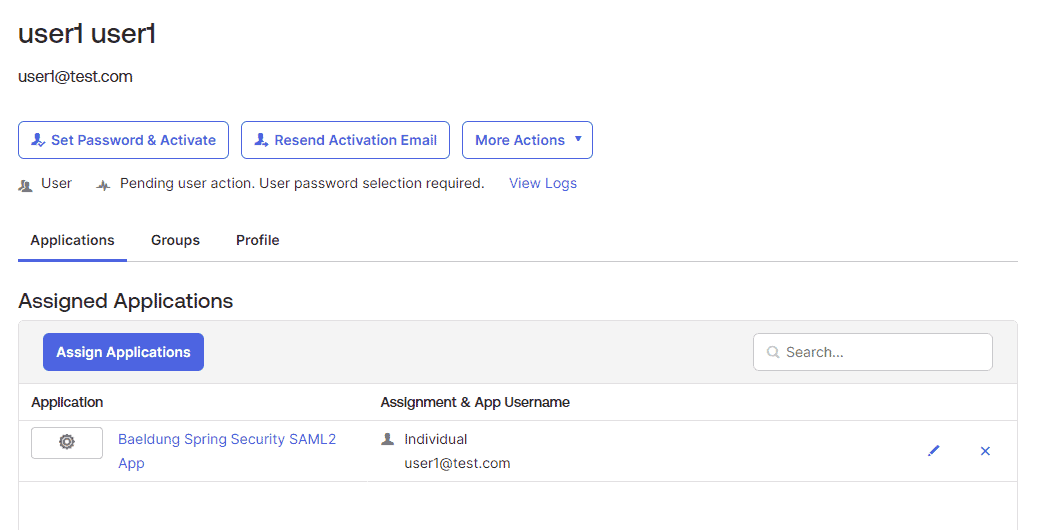
Finally, we click ‘Assign’ and follow a few steps to assign the new user to our SAML app.
5. Testing the Application
Now, we’re all set to test our app. Let’s launch our Spring Boot app and open the default endpoint for our app at http://localhost:8080. This takes us to the login screen: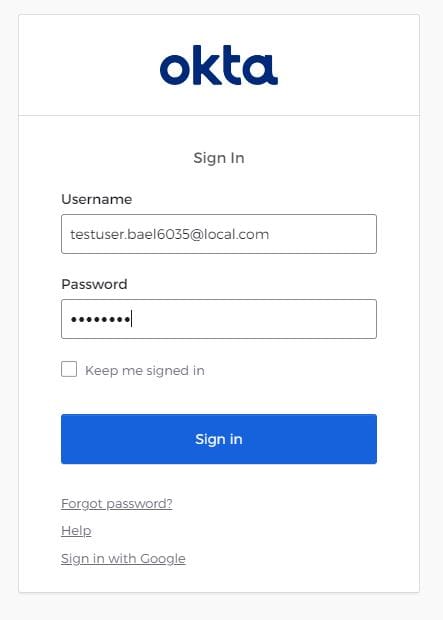
Next, we’re on our successfully logged-in page. In addition to our username, we also get user attributes shown on this page, such as the emailAddress and the firstName:
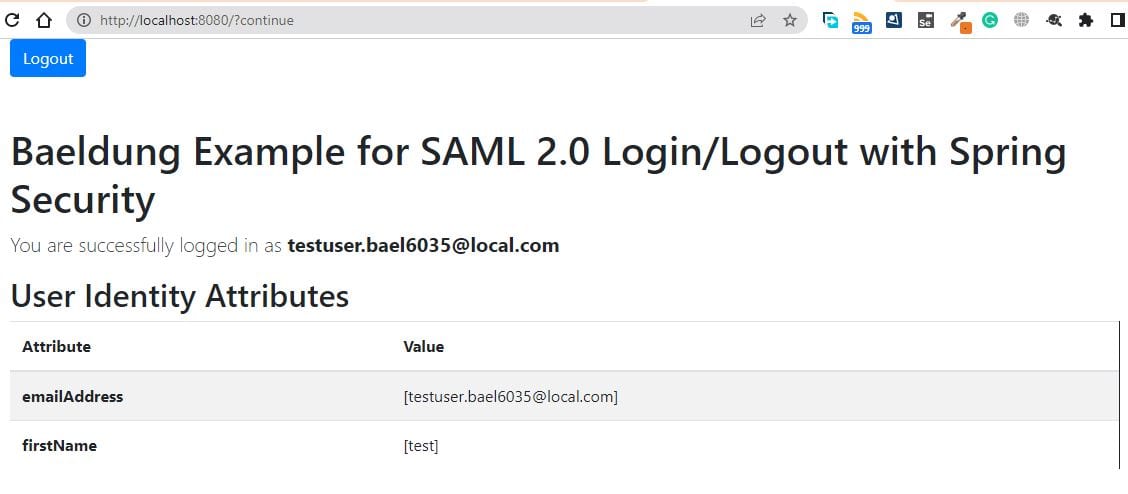
This concludes the entire process of setting up our SAML app. But, before we leave, let’s check one last thing: the ‘Logout’ button.
First of all, we need to set the property <OKTA-ID> as your okta identifier (you can see that in the URL):
spring:
  security:
    saml2:
      relyingparty:
        registration:
          okta:
            ...
            singlelogout:
              url: https://dev-<OKTA-ID>.okta.com/app/dev-56617222_springbootsaml_1/exk8b5jr6vYQqVXp45d7/slo/saml
              binding: POST
              response-url: "{baseUrl}/logout/saml2/slo"
Then we will be able to log out from all our SAML sessions against the logged-in user:

6. Conclusion
In this article, we learned about Spring Boot Security SAML2 support. Although SAML2 is a complex technology, it’s the first choice for large enterprises. Once we understand SAML2, it’s really fun to utilize the powerful features it provides. In addition to securing our application, SAML2 allows us to use SSO and avoid remembering multiple usernames and passwords for dozens of applications.